
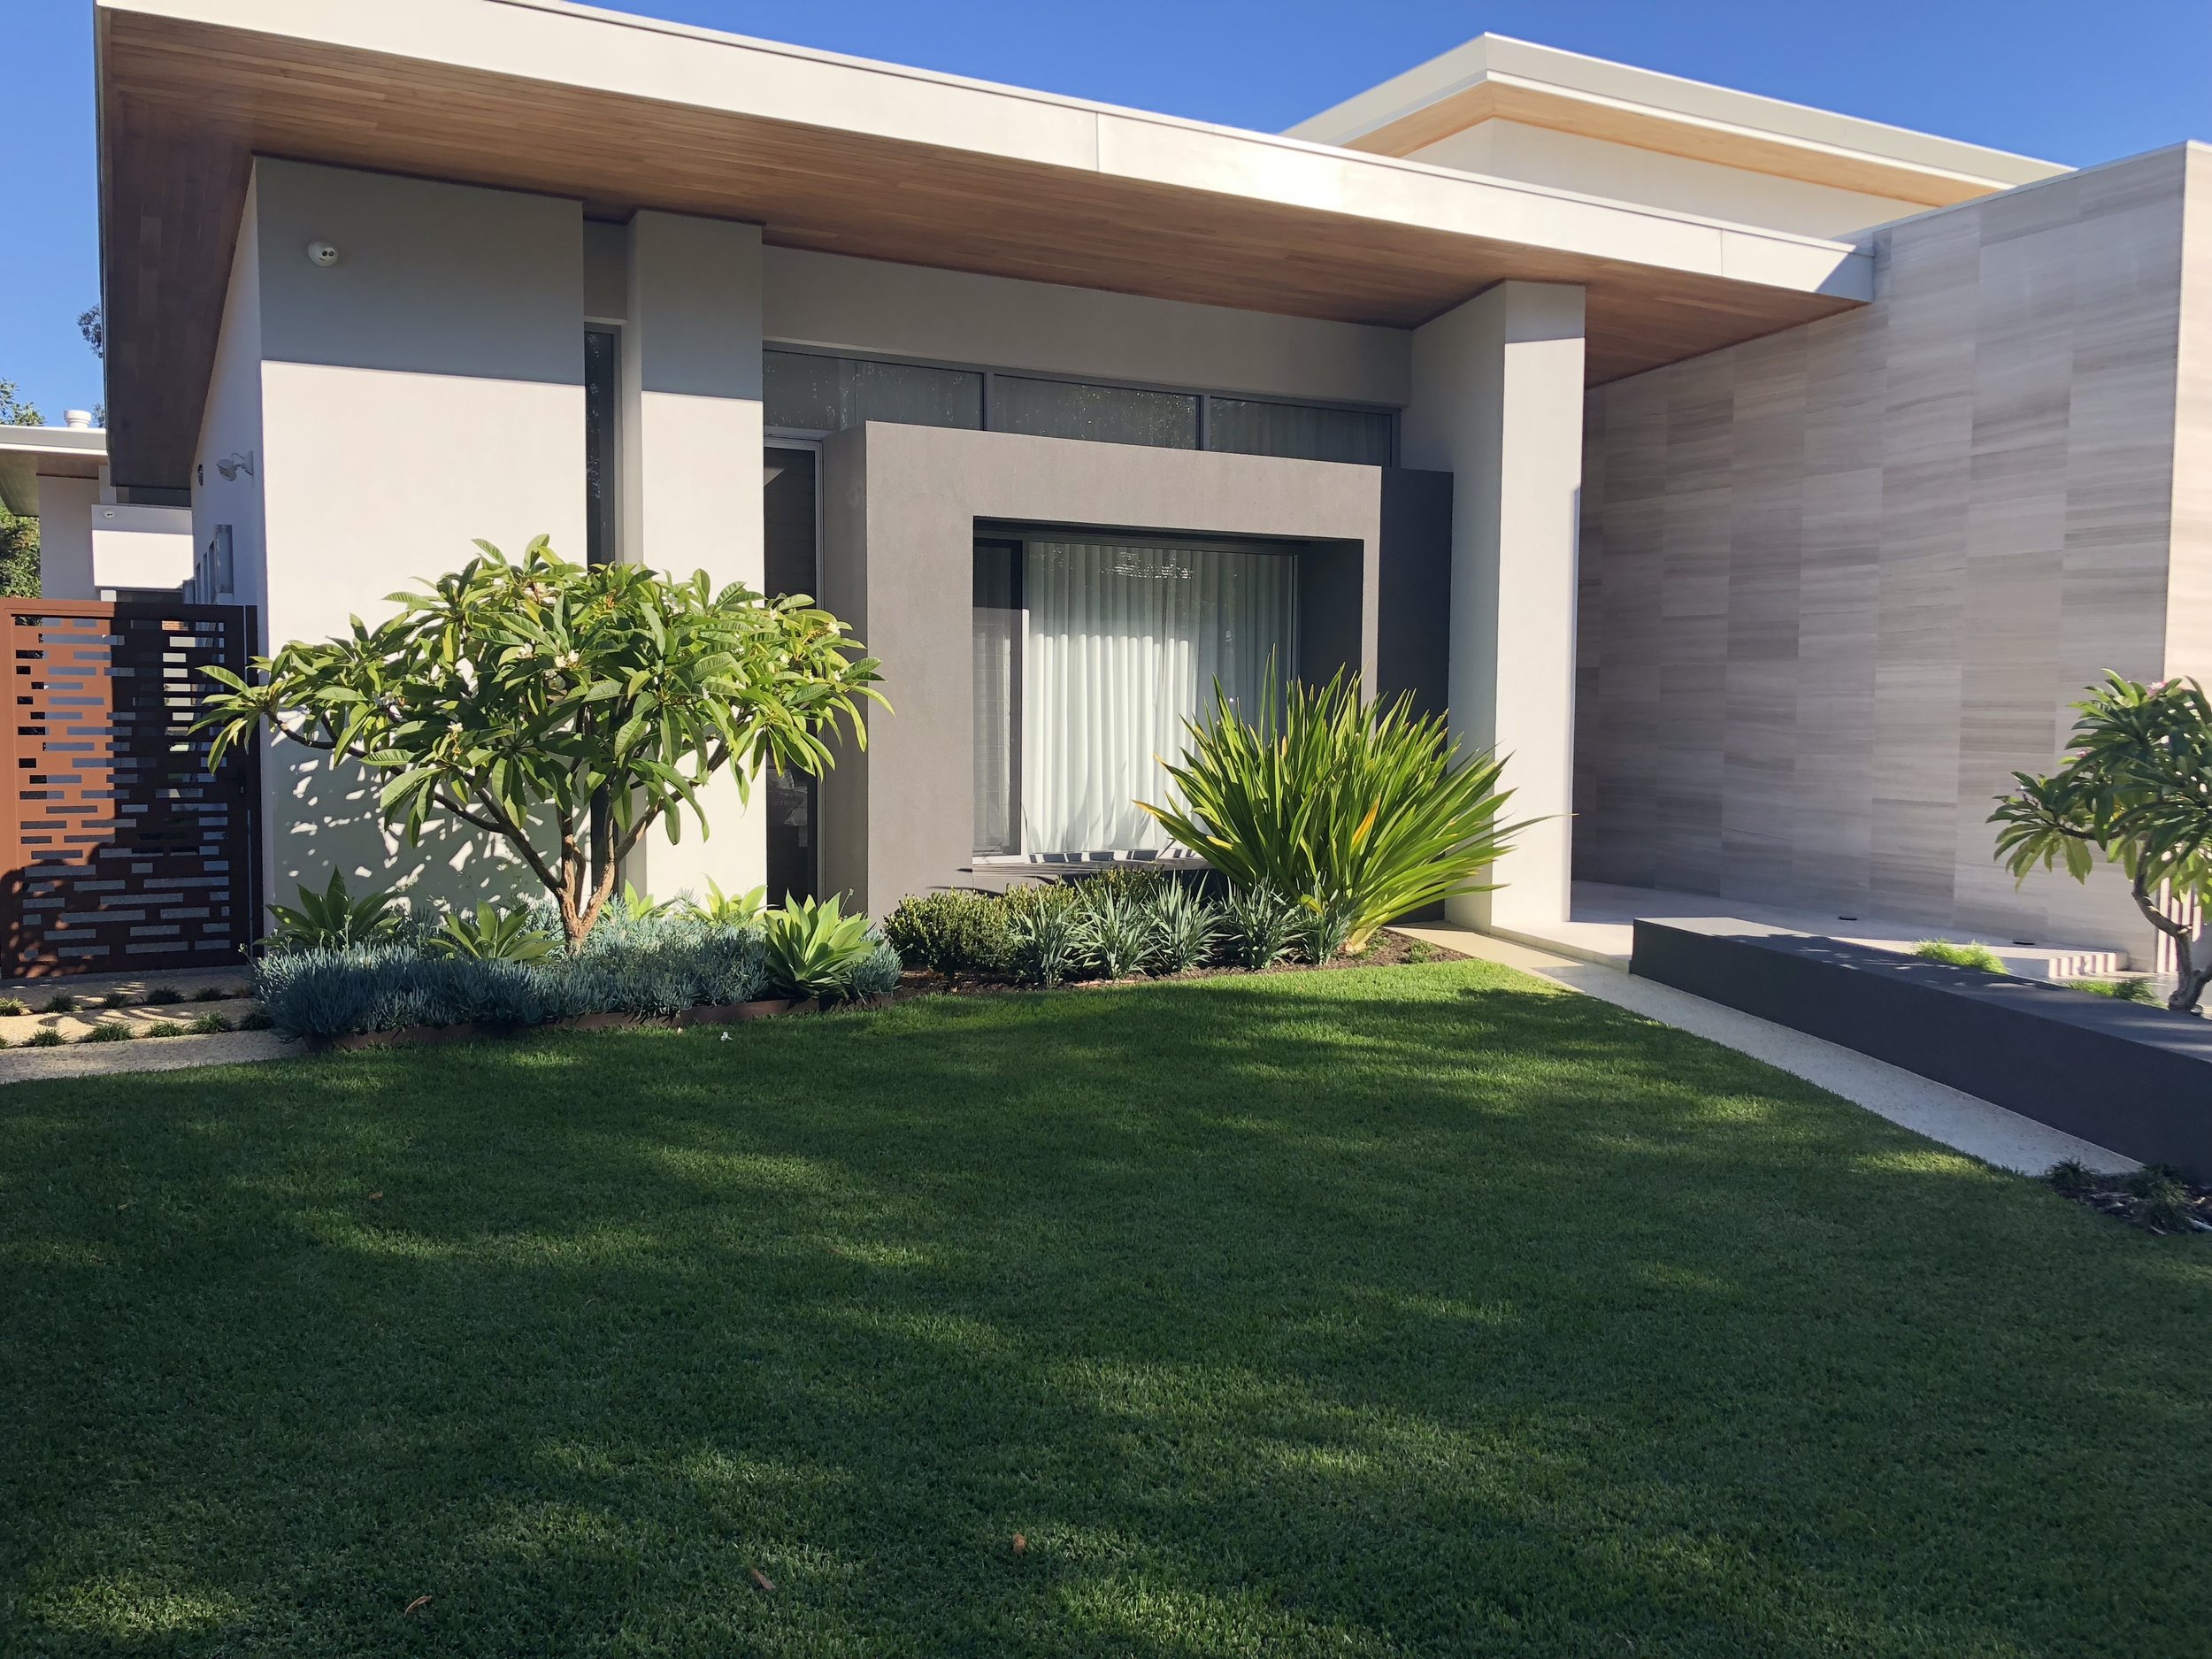
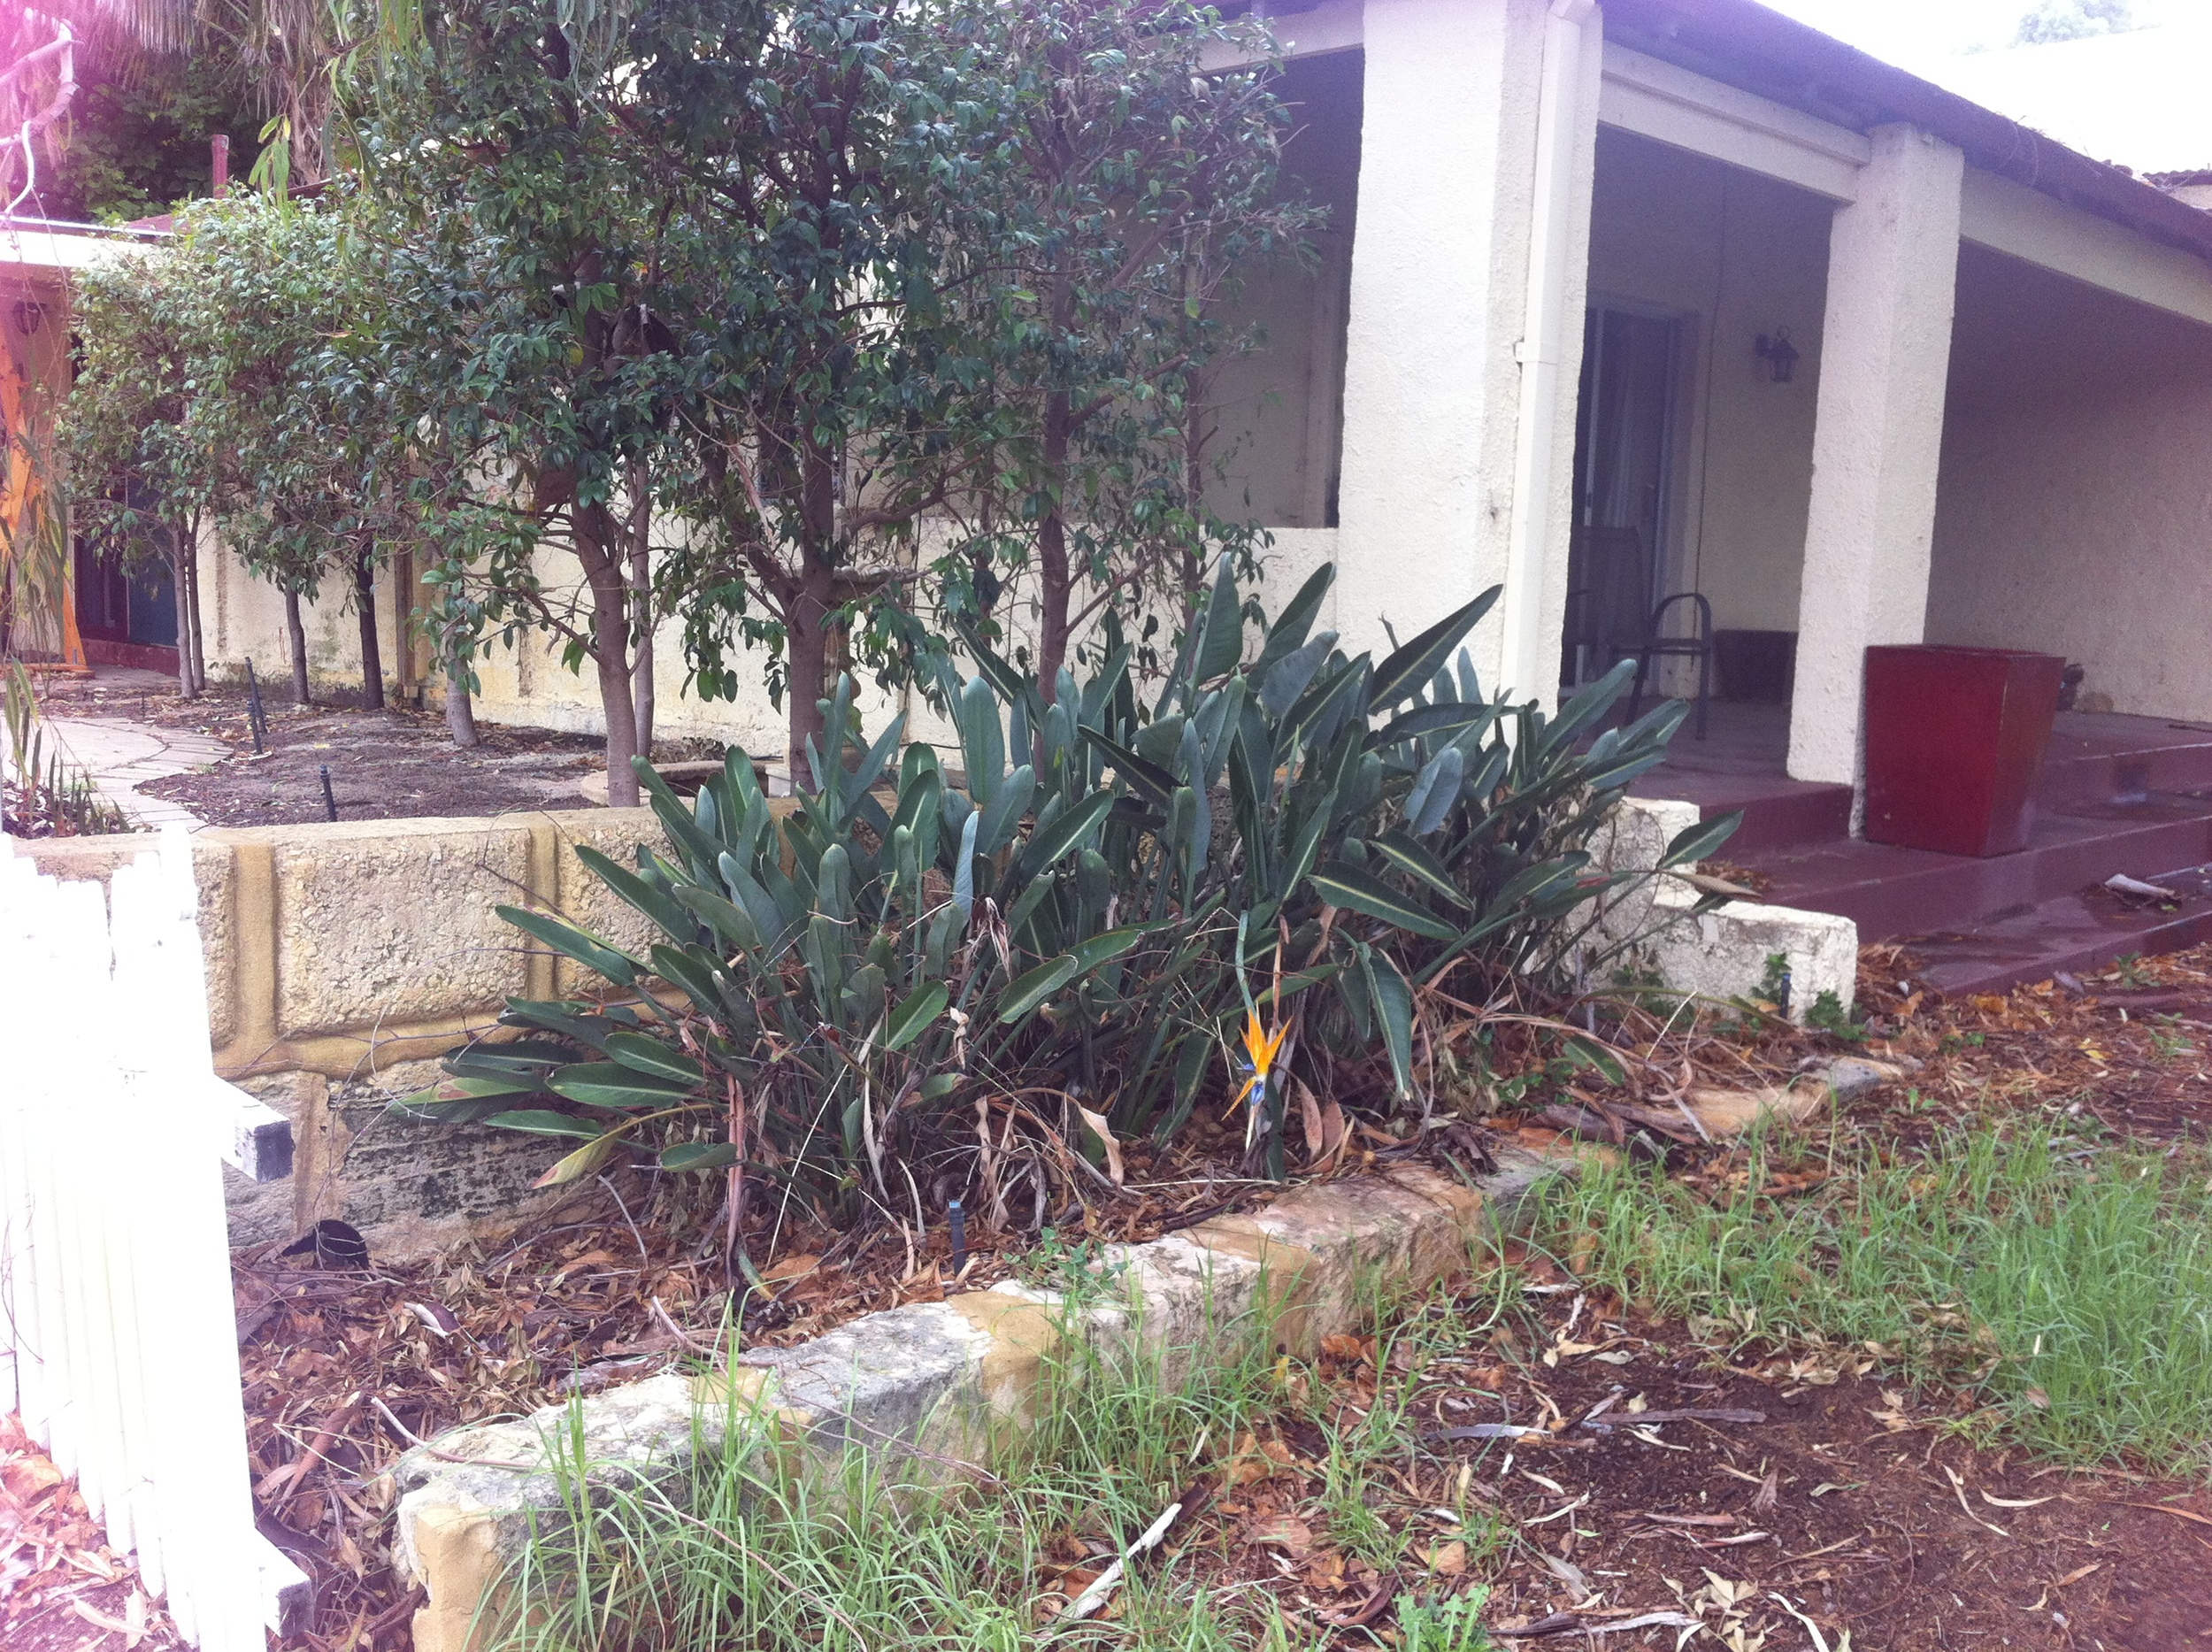
Goldsmith St........ 9 months on....
Its always very humbling to visit a garden once it has become established. We do a lot of soil preparation before we put the plants in, to give them the best possible start to their new life.
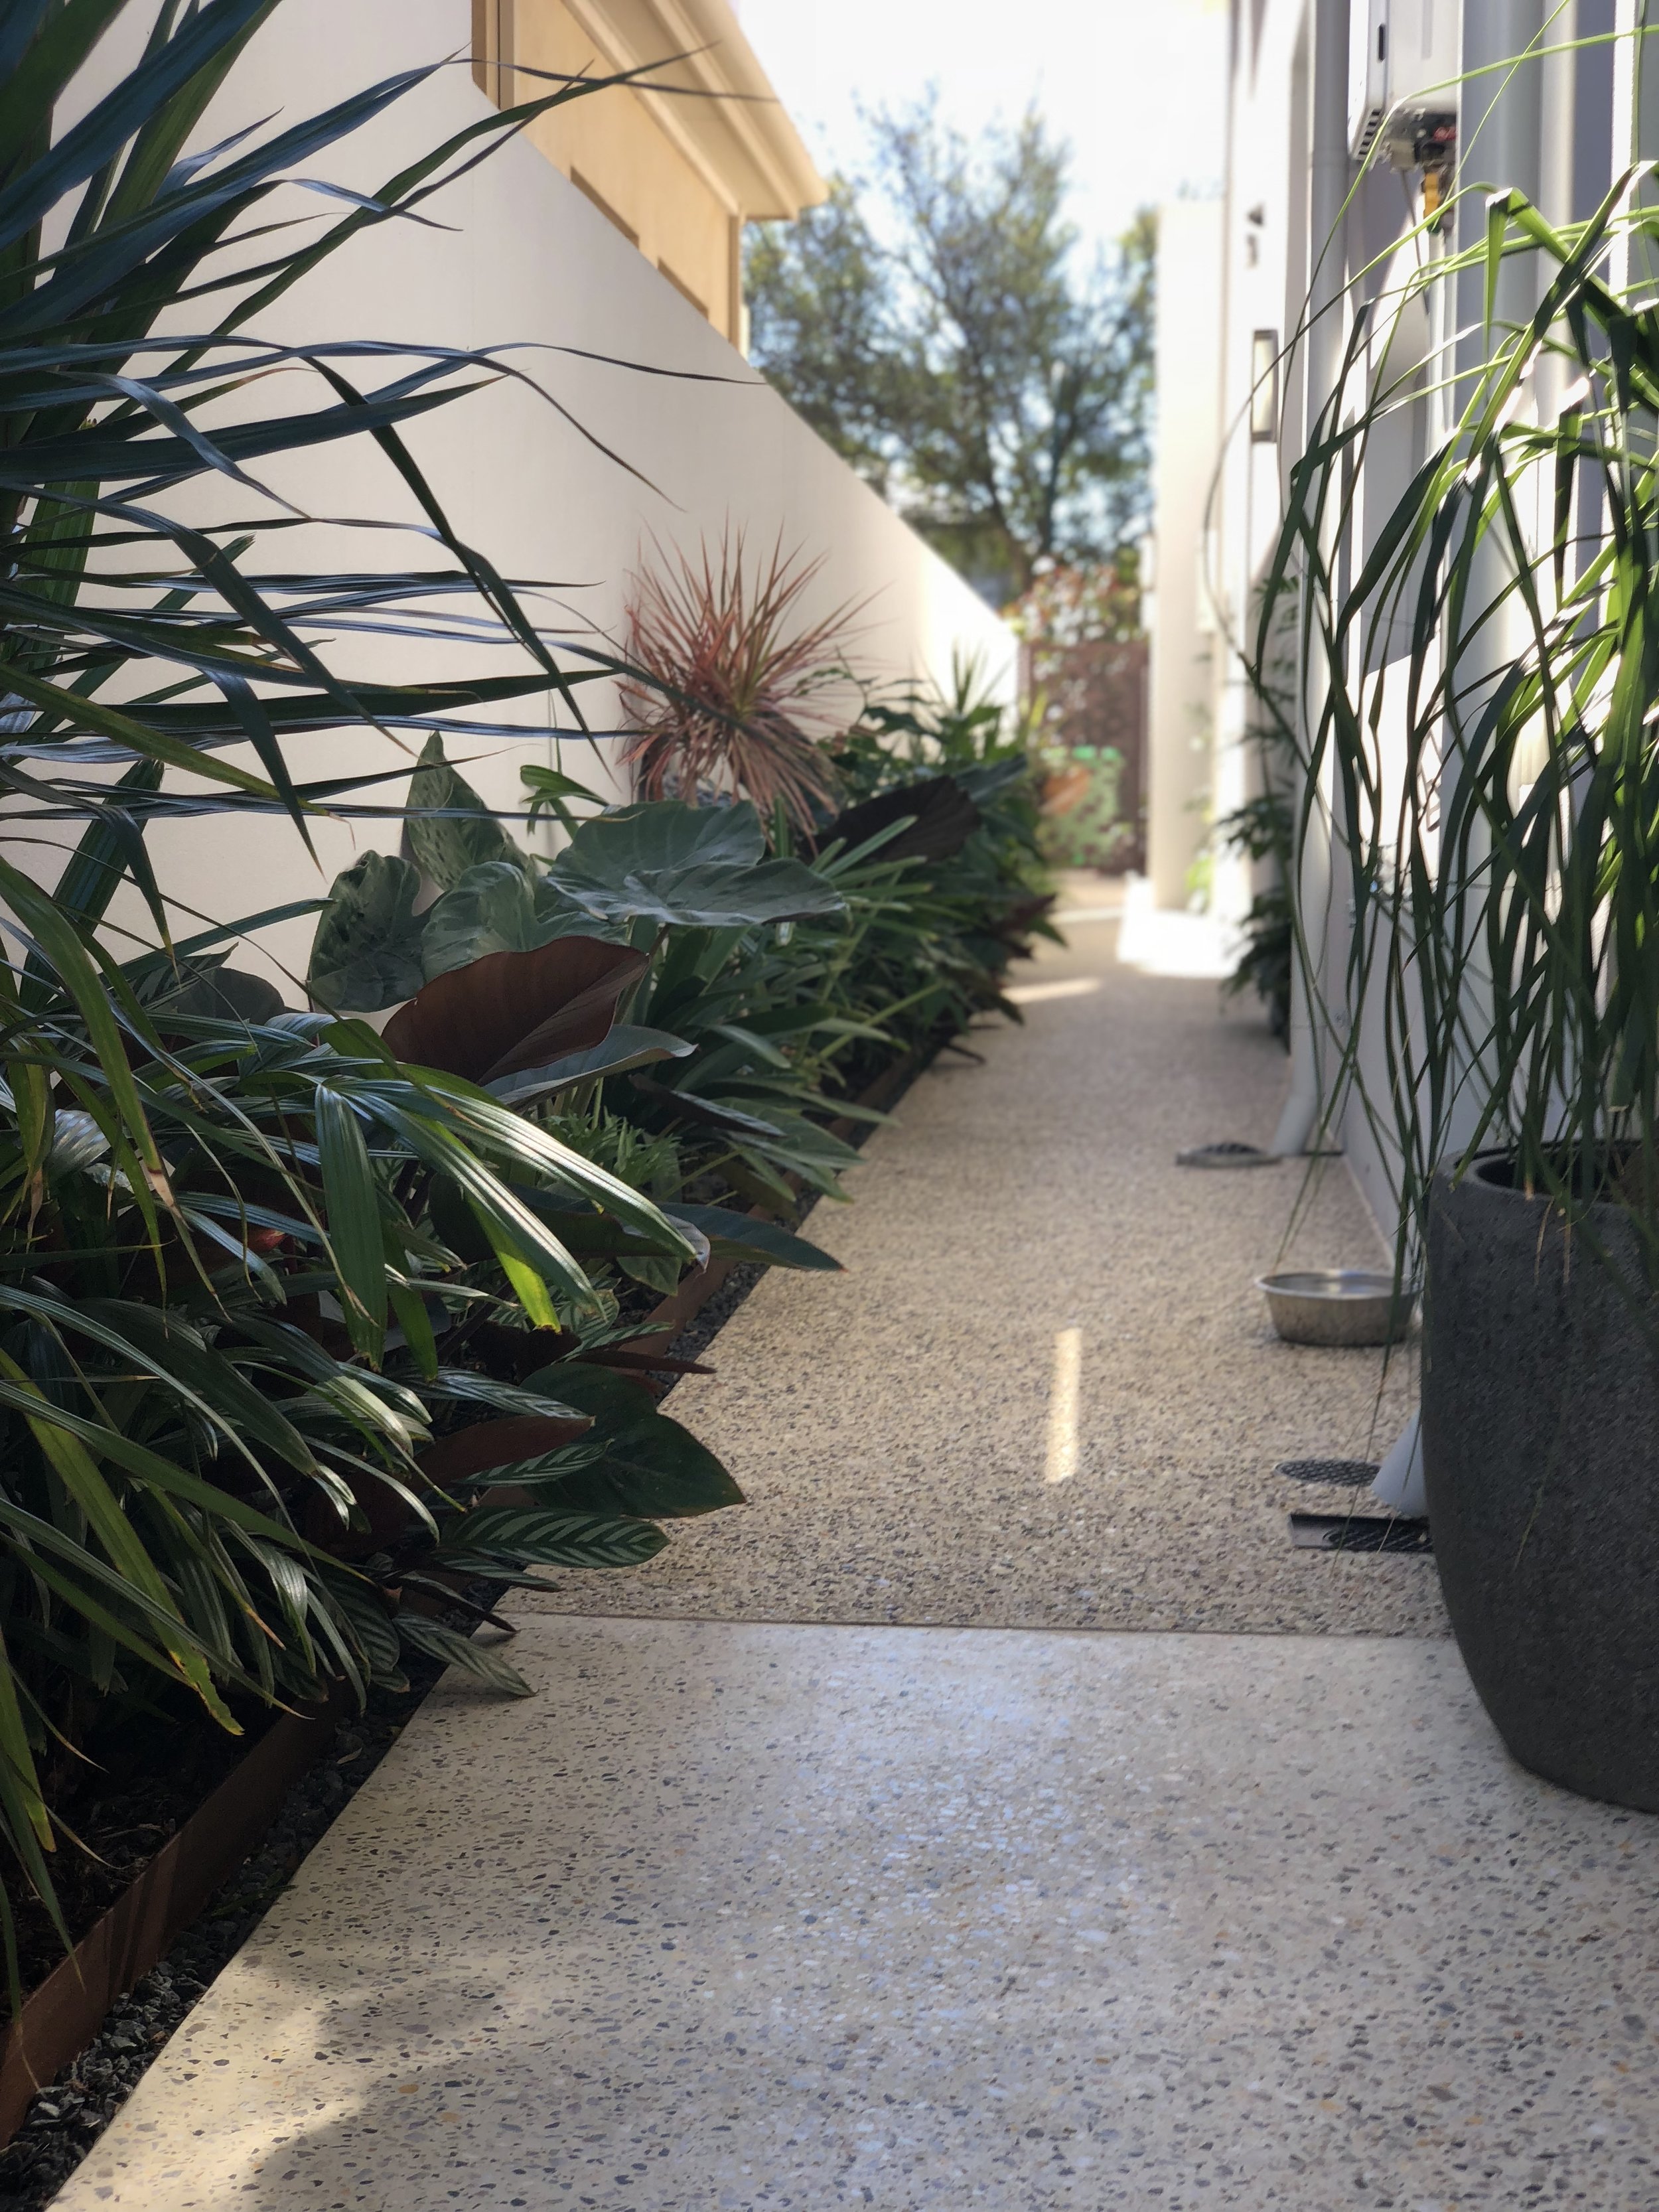
We visited this garden recently and I was very surprised to realise that we had only finished it 9 months earlier. Major kudos to the home owner who loves spending time in his new garden and takes great pride in how it looks.
To see the 'before' photos, go to the Projects page and click on the link for Goldsmith. This is how it looks now (May 2018)


What do I need for my initial consultation?
So you have decided to get professional help with your garden. What do you need for that first meeting?
- Plans - A site plan and a house plan. If you dont have one, you can usually get a copy from your local council. Some charge a small fee for this process.
- Likes - Pictures of gardens that you have seen and liked. Good places to find suitable pictures are books and magazines, but there is also some great online sources as well. Try Pinterest, Houzz and Homify. You can often save your favourite pictures to a file and then share them with your designer via email.
- Dislikes - Just as important as pictures of gardens you like, is a good idea of what you dont like.
- Budget - This is always a hard questions as most people dont know what it costs to build a garden or what they should spend on doing it. A good rule of thumb, for a new house is 15-20% of the capital value of the home. The cost of the garden will ultimately come down to the cost of finishes, the amount of space you have, the scale of the works that your are after and your access. By providing your designer with a rough budget, they should be able to design the garden to create a suitable outcome for the space. Alternatively, the designer can design the space with your wish list, then provide a costing that you can work through together, to remove and add items until you are happy with it. A designer can also tell you the best way to phase the works, so if budget doesnt allow, then get the best use of your money now and then add the extras down the track.
- Function - A good thing to think about before meeting your designer is 'How do I want to use my garden?' Do you want to entertaining large groups of people regularly, large lawn areas for children to play, a lap pool for the swimmer in the family or just a small plunge pool for chillaxing in summer? Do you need a shed, a clothesline, somewhere for the bins, veggie garden, trees.....the list goes on? The best thing to do is to start writing a list and bring it to the consultation.
How to give your garden a xmas makeover...
1. Create a daybed/or reading nook in your garden. Whenever you want a quiet moment or the weather is beautiful, you will find yourself gravitating to this spot with a book and a cup of tea whenever you can.

2. Update with new brightly coloured cushions and matching accessories to your alfresco.


3. Put in a herb garden. Planting herbs you use regularly such as mint, parsley, rosemary, basil and sage is a fantastic extension to your kitchen, and you are more likely to step outside to snip some fresh herbs for your cooking if its just a few steps away.

Photo by Jani Bryson/iStock / Getty Images
4. Liven up a dull space with a vertical garden. Can be made simply using some leftover pallets.
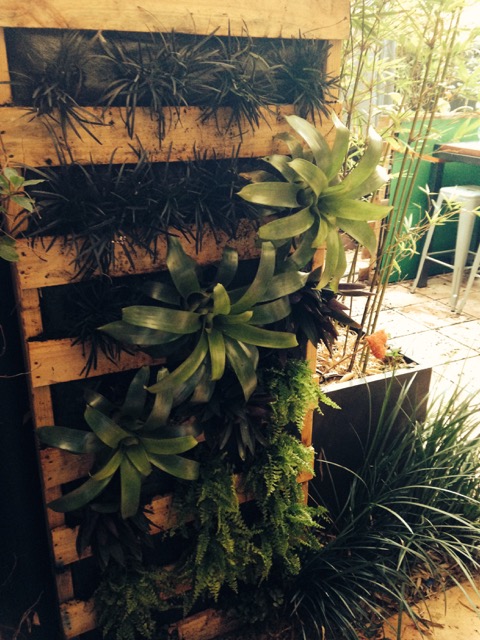
5. Add a tree. - For shade, fruit or simply to provide some vertical scale to the garden.

6. Paint your fence. - So often I go into gardens where the fence has been left unpainted or its a light colour. The best fence colours is a dark colour, so then the fence blends into the shadows of the planting. Opposite to interiors, a dark fence will make the garden appear bigger.

Recycling filing cabinets as planter boxes...
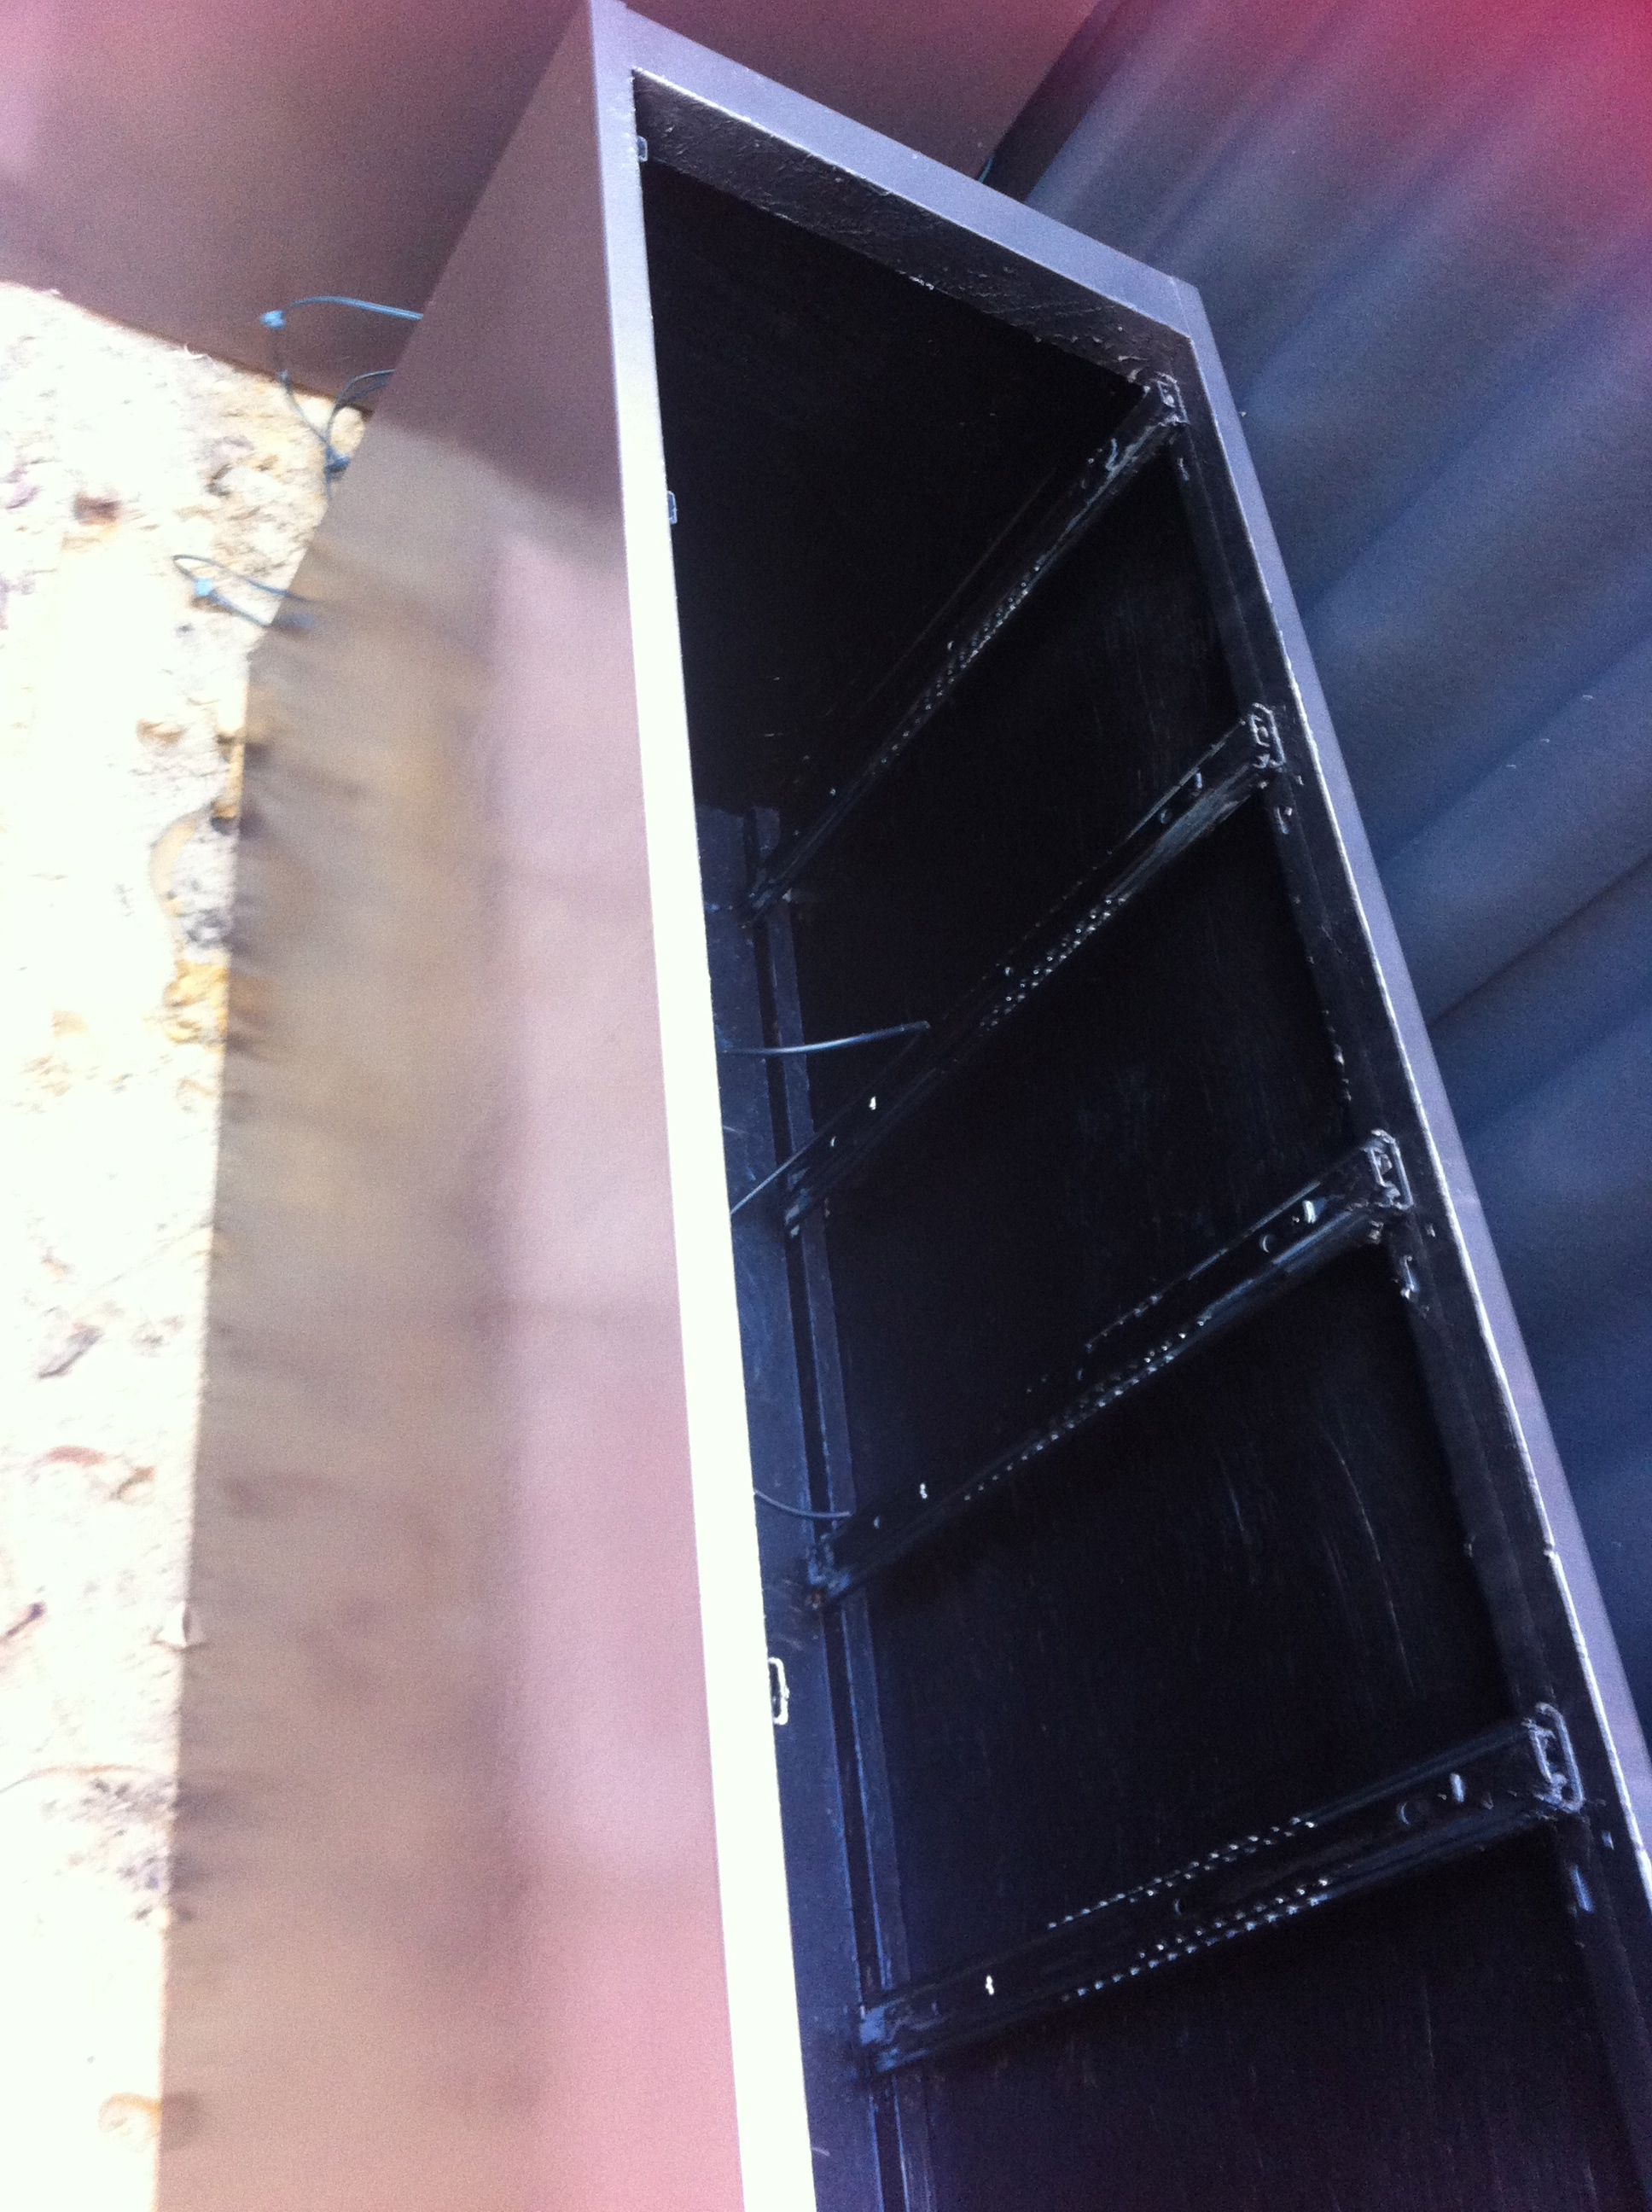
Being a Landscape designer, I am often specc'ing products into my clients gardens that I can rarely afford myself. One of my big loves is rusted steel planter boxes. I custom design these to fit into particular spaces, and they take up a lot less room than building in a brick version. The offer a great contrast to other surfaces around them and the thin nature of them means more soil and space for the plants.

A steel planter that I designed into a TDL garden. This one hides an ugly junction between retaining walls.
When I purchased my little town house with its tiny courtyard, I knew I wanted to plant bamboo, to provide a little privacy, but also to block out the ugly walls of the two storey townhouses. I wanted the bamboo to be in planters so there was no fear of them getting out of hand, or growing into neighbouring gardens. So of course steel planters were the perfect solutions. But there was no way I could afford the outlay to purchase the number required to put around the perimeter of the garden.
Pinterest to the rescue! I was scrolling through one day and spotted an old filing cabinet that had been spray painted a bright colour and it was filled with home grown veggies.....yum.

Found on Pinterest. Author unknown.
So off to the tip I went, and purchased 3 x 4 drawer cabinets and 1 x 3 drawer cabinet for under $100. Then to Bunnings and purchased some Crommelins Blackseal and spray paint in a hammered brown finish (2 cans per cabinet)

Working out how I am going to lay them out. The kids insisted the ugly water feature has to stay, so Im hoping the bamboo will hide it a bit :)
First, I removed and discarded the rails etc, then drilled a heap of holes in the bottom for drainage.
Painted the insides with 2 coats of Crommelins Blackseal to slow down any rusting from the inside out, following the manufacturers instructions.
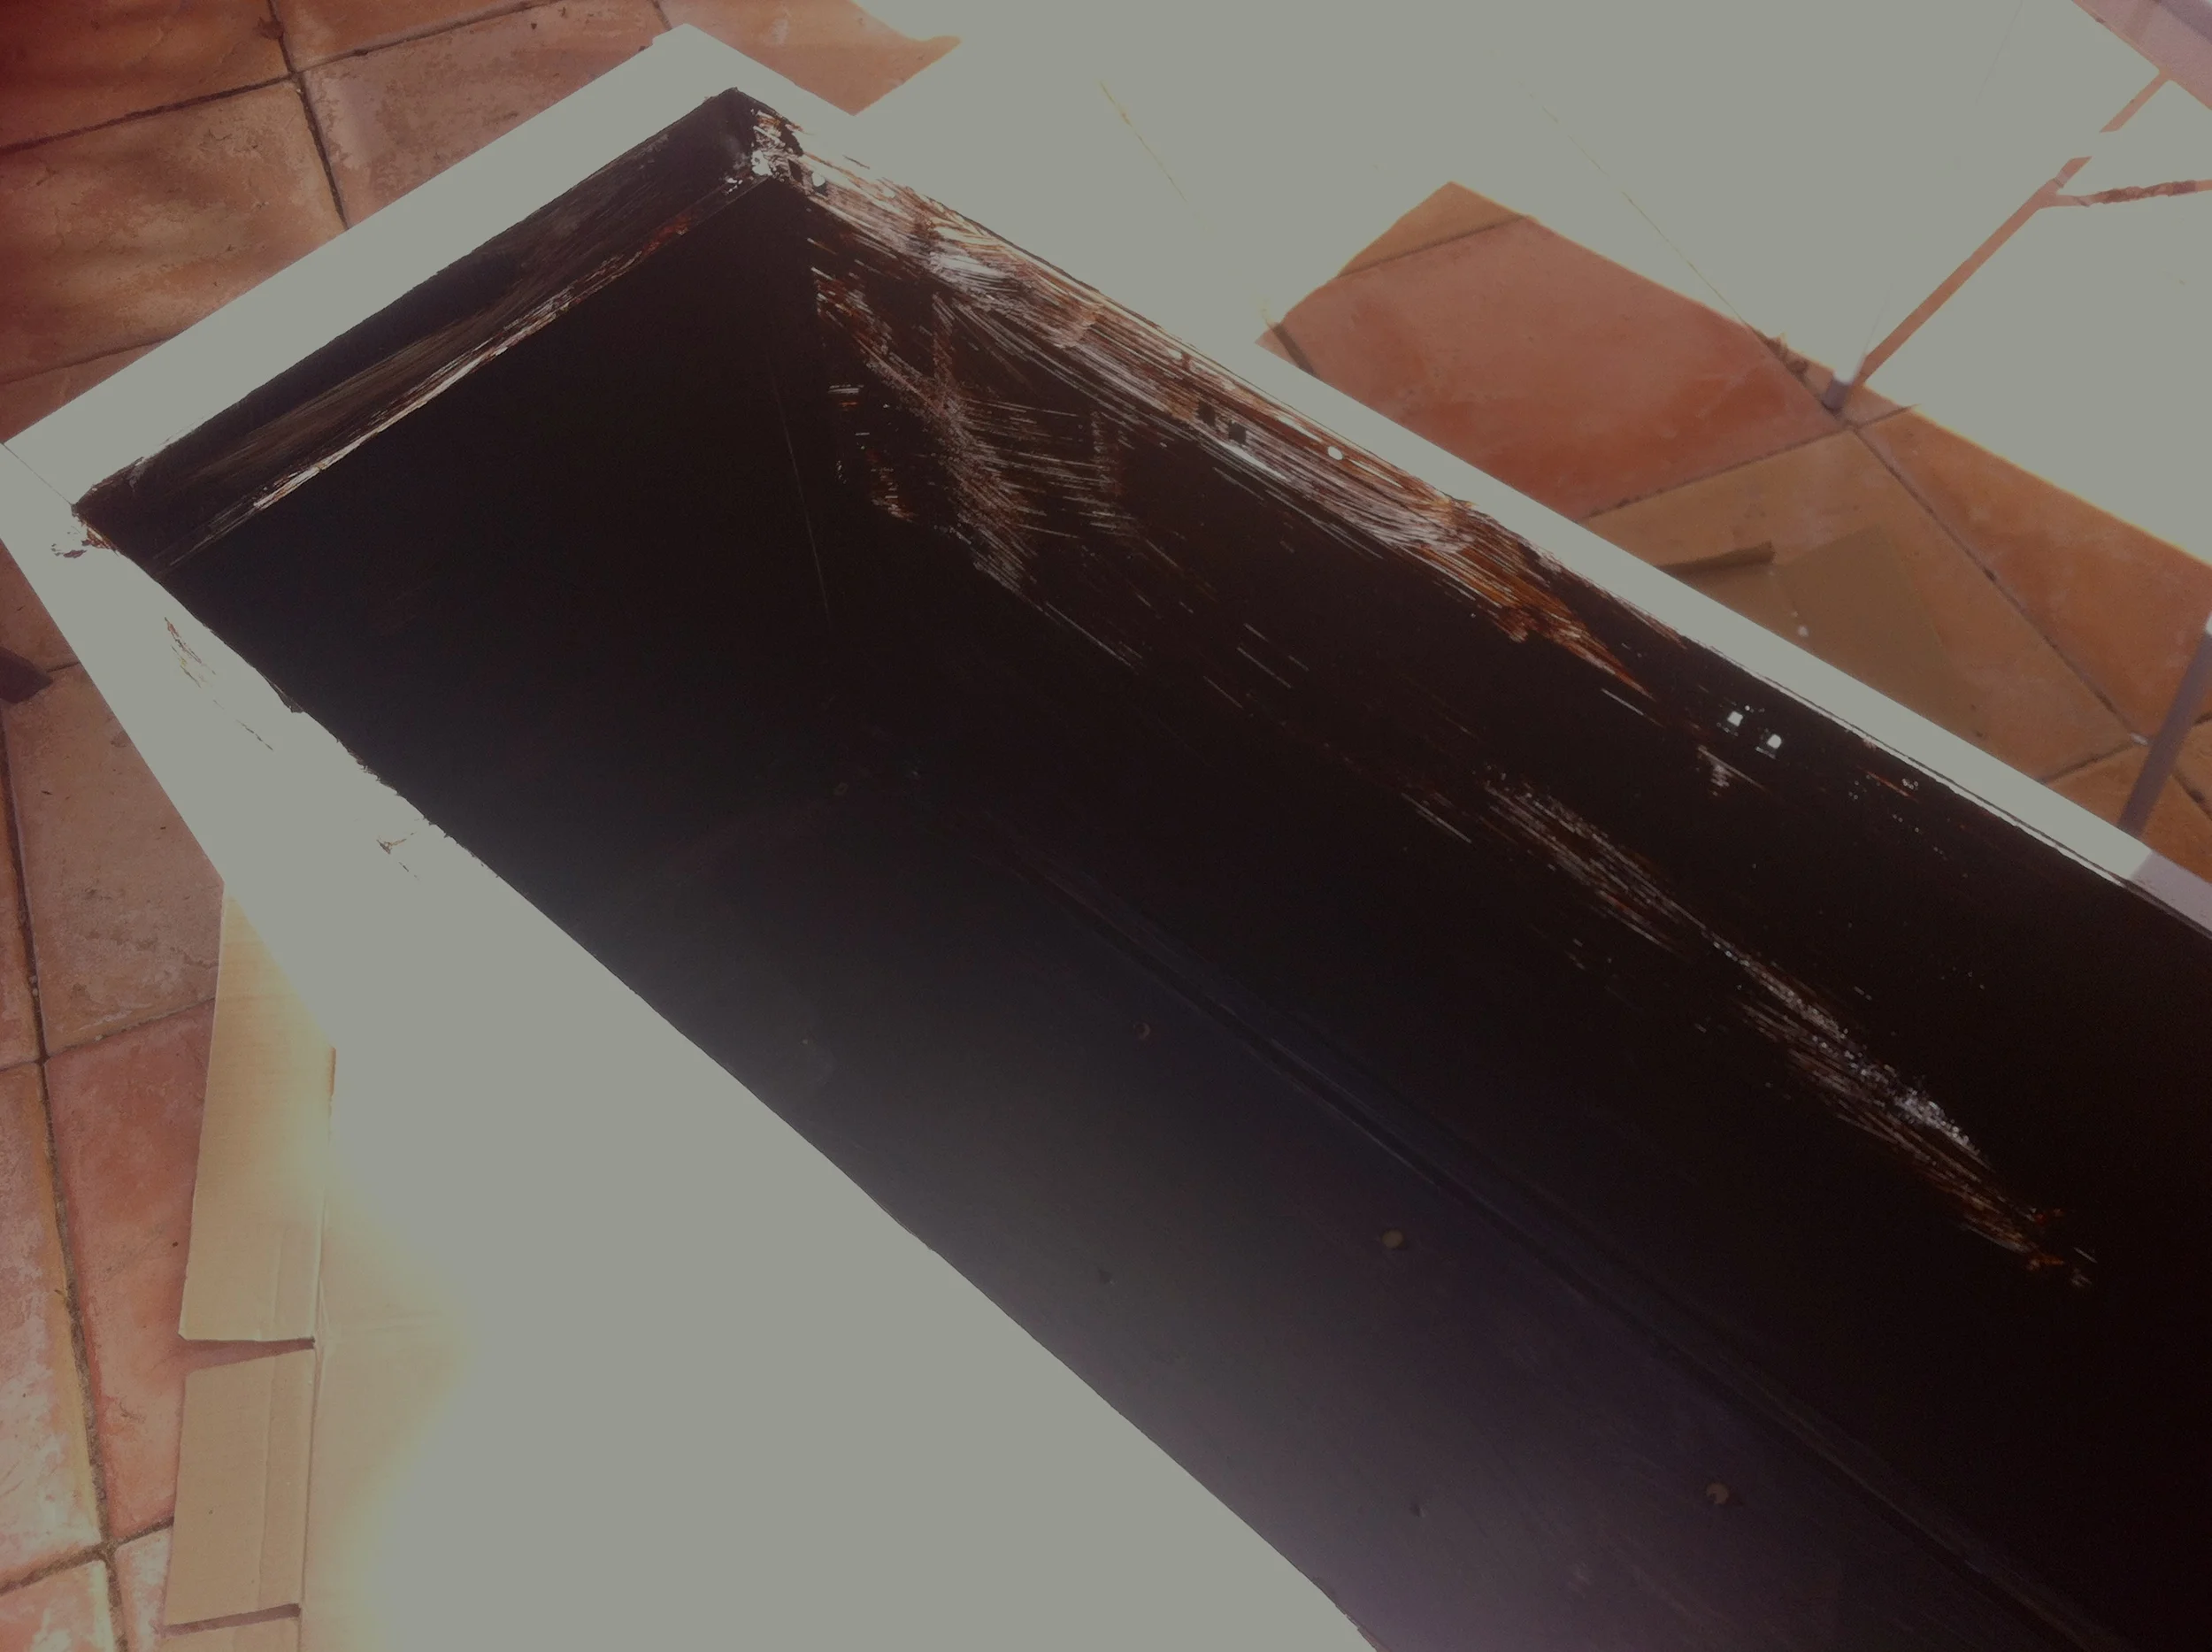
After the first coat. Make sure to add at least 2-3 coats to give a nice thick, even coverage. Sealed with Crommelins Blackseal
Once that is dry, then comes the fun part. Using your chosen colour of spray paint, coat the outside of the cabinets several times. Make sure you get a good even coverage to all exposed areas, again to help protect it from surface rust.

This colour is by Dy-Mark and is in a Hammered finish. Colour Hammered Brown
I then added my drip irrigation. This was fed through one of the holes in the base.
Locate your planters where you want them. Once the soil is in, they will be impossible to move!

A little paint on the fence helped improve the look of things too! Colorbond Monument is a colour I like to use on fences. Once the plants are in place, the fence then becomes the shadow and the plants stand out.
Add you irrigation, when they are all in place
Use a good quality potting mix and add your plants. These are Slender Weavers Bamboo (Bambusa textiles gracilis) which are fast growing, grow well in narrow spaces and get to a height of around 3m.

Some Lirope is added around the base to soften the edges.

One day, this paving will be removed and I will have decking....just one of those things I spec, but can't afford!
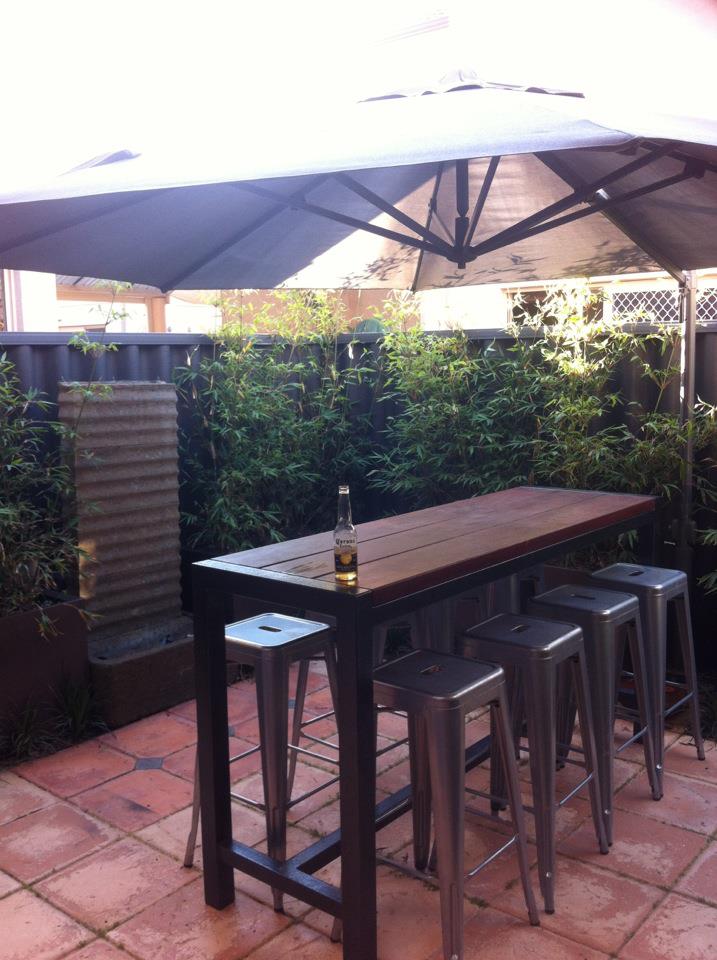
This is how the garden looked after one year...and how we use the courtyard in summer. Umbrella up and an ice cold Corona.
Today (2 years later) some of the canes easily reach 3-4 metres. The Liriope gigantia is going gangbusters and the pots are standing up strong. They could all use a little touch up paint, but rusting is not a problem yet.

Reducing the glare from those apricot coloured walls behind. And notice how the fence doesn't glare out from behind the plants

Kokedama, what, why and how.....
While trawling through through hundreds of Pinterest pictures a few weeks ago (something I like to do while I am having a horizontal moment on the couch) I found the most amazing pictures of hanging gardens or as they are more formally known 'Kokedama'. This of course immediately tweaked my creative interest and I HAD to try making one....or four!
There are a few websites that run through the process of making them and even YouTube videos. But here is how I made mine.
What you need

1 bag of Bonsai mix
1 bag of Peat moss
1 brick of sphagnum moss
1 bag of Richgro Sand to Soil (with bentonite clay) - not shown
string
baby plants - try maidenhair fern, succulents
green moss (available from florist supplies)

Firstly, mix 1/3 of each the bonsai mix, peat moss and clay into a container with a little water. Keep mixing until it comes together to form a ball. This ball should hold its shape if you toss it in the air.

Then you need to gently knock the soil off the roots of your plant. The more you can remove, the better. Then wrap the roots with a small amount of wet sphagnum moss.

Split the soil ball in half and put your root ball inside. Then work the soil firmly around the roots to seal the ball completely.


Then you can start placing large sheets of the green moss around the ball. I quite enjoyed how this felt. I think that the texture reminded me of playing with moss in the bush when I was a child.

Press each sheet on firmly and tear off smaller bits to fill any gaps.

Then start wrapping the ball firmly with the string, winding in many directions to secure all of the green moss. When you are happy with the finished look, and that the moss is secure, tie it off. This one was hanging by the string, but I've started cutting the string off and looping some fishing line through to hang it. For something different, try wrapping your ball in a brightly coloured string.
Sphagnum moss can be used to cover your ball if you are having trouble with the green moss.
Maintenance ... I've found the best way to water the plants is to dip the ball in a bucket of water for a few seconds. Also spray the leaves with a water bottle occasionally.

Ive hung 3 of these in a protected spot near my front door. My visitors see them when they arrive and they are right outside my office window..... Little bit of green in my concrete jungle.
Maintaining and managing your garden for the bushfire season...
Part 6
Establishing a new garden takes time, and to ensure that is effective in the years to come it will require regular ongoing maintenance to protect the defendable space around your home.
Regular maintenance actions for the garden as part of your Bushfire Survival Plan should include:
- Clear ground fuel from underneath plants and around the house.
- Re-mulch with non flammable materials, such as stone, shells or other non-flammable materials.
- Prune plants with low hanging branches, providing separation of at least 2m from the ground.

- Replace diseased, stressed or dead plants. Ensure to replace with low flammable plants as per my previous post.

- Keep plants well hydrated through watering and mulch. Watering less frequently but for longer encourages the plants to develop deeper roots and therefore reducing moisture loss during hot spells.

- Remove other flammable objects from within your defendable space.

- Remove any fine, dead material that has accumulated within plants.
- Remove weeds from the defendable space.

- Mow lawns and keep regularly hydrated.

(source: CFAVIC Landscaping for Bushfires, 2011)
(all photos in this article by: Kerri Fennell)
Please stay safe for the rest of this bushfire season. That is the end of this series of posts. Im really looking forward to sharing with you over the next few weeks some other things I have been working on lately. How to make a pallet garden for your herbs, filing cabinet planters, design lessons learned along the way, and my week in Bali.
Perfect plants to reduce the intensity of a bushfire near your home.
Part 5
The next task, after planning and designing your home and garden, is to choose suitable plants. Selecting plants with some intrinsic characteristics, that reduce the likelihood of ignition, could help reduce the bushfire risk within your garden.
There are several characteristics that influence how flammable a plant is. These are plant flammability, plant moisture content, branching patterns, texture, density, leaf size and shape, bark type, oils, waxes and resins, and the retention of dead materials.
Plant Flammability
Some plants are more flammable then others and the flammability can vary in unpredictable conditions.
Plant flammability can be described as a combination of
- the time taken to ignite
- how readily it burns
- how much material there is to burn
- how long it takes until all the available fuel is consumed
Flammability will vary depending on
- a plants age, health, physical structure and chemical content
- the daily and seasonal climatic changes
- location of the plant in relation to other vegetation and flammable objects
- the specific part of a plant (some parts are more flammable than others)

Great spacing and plant selection, along with a stone mulch make this style of garden perfect. (Photo: Kerri Fennell)
Plant Moisture Content
Plants, such as succulents, with a high moisture content will not burn until the moisture has been removed. Plants can dry out as a result of radiant heat, especially if they are exposed for long enough.
Dry plants will ignite more rapidly and continue to burn until the source is removed.
Moisture content depends on a number of factors
- Time of day - before sunrise, plants are typically at their most hydrated. As they transpire during the day the moisture content decreases until the plants stops after sunset. Most plants are most flammable in mid to late afternoon.
- The season - In summer the soil dries out and the moisture content decreases
- Part of the Plant - Leaves and new growth generally have a higher moisture content than stems and branches. Dead leaves and twigs have little moisture and become highly flammable on hot, dry days.
- Where it is planted - The sun and shade, availability of water, drainage and soil type will affect plant moisture.
- Environmental conditions - High temperatures, low humidity and periods of drought will increase the flammability of plants.
- The age of the Plant and its growth stage - Plants start as moisture rich shoots and become woody as they age. The older the plant, usually the drier. New growth is generally soft and fleshy.
Branching Pattern
This influences the distribution and density and foliage with the plant.
- Choose plants with an open and loose branching as well as leaves that are thinly spread, as plants with closely packed leaves and branches have more fuel
- Plants with branches at least 2m above ground are better than those with foliage to the ground and stops the foliage acting as a ladder for fuels.

Texture
Coarse textured plants are less flammable than those with a fine texture, because they have a lower surface area to volume ratio.
Density
A plant that is hard to place a hand into, or see through is very dense. These are often more flammable due to the higher fuel load.
Leaves
The fineness, size and shape of leaves affect their flammability.
- Wide, flat and thicker leaves usually means a higher moisture content, so therefore less flammable.
- Small, thin narrow leaves have a high surface area to volume ratio, which tends to make them more susceptible to drying out.
- Leaves with high levels of oils increases flammability.
- The shape can influence how easily they are caught in vegetation when they fall off the plant. If leaves are caught in the plant this can increase flammability.
(source: CFAVIC Landscaping for Bushfires, 2011)

Agaves are perfect with large wide succulent leaves (Photo:Kerri Fennell)
Bark Type
Some bark types ignite more readily than others.
- Bark that is loose, stringy or fibrous will ignite easily and can also act as ladder fuels.
- Bark that attaches tightly or is smooth in texture is less likely to ignite.
- Some smooth barked trees shed their bark annually and trap large ribbons of bark in their canopy. These ribbons are highly flammable and can be carried as embers and can act as a ladder fuel.

This bark is rough, but is held tightly. As it starts to shed, it should be removed to avoid the hazard. (Photo:Kerri Fennell)
Oils, Waxes and Resins
Natural chemicals found in plants can increase their flammability. These plants often have a strong scent when crushed.
These plants should be limited and placed carefully within the garden.
Retention of Dead Material
Dead leaves, twigs and branches that remain on the plant, or accumulate on the ground increase the flammability of an otherwise fire wise plant.
Regular pruning and maintenance of all trees and shrubs to remove these fuels is necessary.
(source: CFAVIC Landscaping for Bushfires, 2011)

Dead leaves accumulating at the base of the plant increases fuel.
List of Plants and Trees suitable for a garden in a fire prone area.
Trees, Groundcovers, Climbers and Succulents


Plants


(source:http://www.dfes.wa.gov.au/safetyinformation/fire/bushfire/BushfireProtectionPlanningPublications/FESA%20Plant%20Guide-BP%20Zone-Final-w.pdf)(source:http://www.education.vic.gov.au/Documents/school/principals/infrastructure/bfpronelandsc.pdf)
Garden styles suitable for a bushfire prone area....
Part 4
In this weeks blog you will find some simple, practical examples of how you can apply the design principles outlined in last weeks blog, to some typical garden styles....
HILLS GARDEN
The hills of Western Australia generally provide excellent conditions to grow gardens. The conditions allow for a wide range of plants to be grown successfully.
As a result, hills gardens often display great diversity and layers of vegetation. Many gardens are located adjacent to national parks and native forests that are highly flammable. The local site and context should be taken into careful consideration with each design.

This property is nestled into the side of a hill with national park beyond. This property required substantial retaining walls, which in turn would help to create barrier to a fire coming through.
COASTAL GARDEN
Strong seasonal winds, coupled with salt can make establishing and maintain a coastal garden particularly challenging. Along with sandy soils with poor water and nutrient retention, the addition of organic matter and mulches is critical to garden success. Creating microclimates is the key to a successful coastal garden, by providing shelter and screening to maximise these problems.

This house, very close to the beach is subject to constant high winds. Any fire coming off the dunes needs to be quickly stopped before it consumes the house.
SUBURBAN GARDEN
Recently, severe fires have moved beyond the rural fringe and into our suburbs, especially as many of our new suburbs are creeping into the outskirts of the city.
The planning principles from last weeks blog, should be followed as closely as possible, given the limited suburban space you may have.

Luckily for this house, they have quite a substantial sized block, compared to a lot of the new suburbs being currently built. However, the same principles apply.
RURAL GARDEN
Many rural gardens are on large farming properties and the house and garden location should be considered carefully, along with the placement of other structures, elements and services.
Paddocks surrounding a house can quickly dry out over summer causing fire to spread rapidly. The defendable space around the house is the most critical component, along with good planting and design strategies.

Also note that the house position is relatively close to the roadway and the driveways give fire trucks and other services plenty of room to access the property. This property also has a 5m wide fire break around its entire perimeter. The neighbours each have the same, therefore creating a good sized 10m fire break around their properties.
In next weeks blog we will look at what plants you can put in your garden that will reduce the chance of ignition, or lower the intensity of the blaze.
Planning your house and garden to prevent bushfire....
Part 2
Reducing bushfire risk is most effective when considered early in the planning process, and there are a number of factors to consider.
Source: Lifestyle.com.au - Grand Designs Australia - Bushfire House
New Houses
The first thing you should be aware of, is your local building and planning requirements. These vary from council to council and could influence where the house can be built, the level of construction required, and even how they want the vegetation managed on your property.
One of the most effective ways to reduce bushfire risk is to locate the house in the most appropriate location. Ideally the house should be located away from unmanaged vegetation, steep slopes, saddles or narrow ridge tops. Ideally as close to public roads and accessways, as you can.
You should also look at the risks from surrounding properties and if the existing vegetation within or close to your property could pose a significant risk.
The design of the house plays a part too. Anywhere embers can lodge or enter a house can pose a risk. Things like decks, windows, doors and roof areas or complex designs that create little nooks and allow leaf and plant debris to accumulate can all contribute to the overall risk.

Hollingworth House at Point Henry, Bremer Bay, Western Australia. Photo: Andrew Halsall
Read more: http://www.watoday.com.au/wa-news/was-bushfireproof-housing-project-thats-designed-to-be-burnt-20131028-2wc3l.html#ixzz2qujU5HUM
Defendable Space
This is an area of land around the buildings where the vegetation is modified and managed to reduce the effects of flame contact and radiant heat.
This is comprised of an inner and an outer zone with different vegetation management requirements, careful garden design considerations and requires regular maintenance as part of your Bushfire Survival Plan.
Essentially this is a clearance zone around your home, and the size will depend on the planning scheme of each council. This does not mean clearing all plants and trees.
Some plants are lower in flammability and are suitable to be closer to the house. Locating things like lawn, ponds, pools, tennis courts, concrete, gravel and paving, close to the house is helping to create a defendable space.
We will look into this further in the next blog.
(source: CFAVIC Landscaping for Bushfires, 2011)
Construction
Construction standards are linked to defendable space and the greater the defendable space, the lower the construction requirement under the Australians Standards (AS3959-2009).
Provision of Services
Water is essential for firefighting.
In all areas the water supply must have appropriate pressure, access and fittings and the amount and reliability is critical. Sometimes the mains water supply is cut off, so it is essential to provide a water tank and link it with a pump or generator.
Any roads within the property must be capable of accommodating fire trucks, and which also require specific construction standards.

Source: Pinterest - Breuer/Lundberg Cabin. LUNDBERG DESIGN livestock tank pool. 25-feet diameter and 14-feet deep.
Existing Houses
Much of the information above also applies to existing homes. The resilience of an existing home can be improved by retrofitting some building elements, such as a dedicated water, reassessing the gardens and landscaping within the defendable space and ensuring that fire trucks can access the property.
Landscaping
Gardening is a personal activity and when planning any garden there are many things to think about apart from bushfire.
Some features that home owners generally want incorporated in a garden can reduce the spread of fire by placing them between the house and the bushfire hazards. These can be paths and hardscaped areas, pools or water features, tennis courts and vegetable gardens.

Source: Lifestyle.com.au - Grand Designs Australia - Bushfire House
Whatever the style of garden is chosen, it must be appropriate to the local risk. Consider the bushfire risk early in the planning process by incorporating some of the design principles, which I will talk about in the next instalment of this blog.